I live near Toronto, Canada. On April 8 of 2024, my city will be just on the fringes of a total solar eclipse, with 99.8% of the sun plunged into temporary darkness. Niagara Falls, Buffalo and Rochester, New York, will be in the direct path of the eclipse. Might be doing a drive across the border.

The eclipse is expected to last almost 2-1/2 hours, with “totality” lasting about 4 minutes from 3:18 to 3:22 p.m. local time. NASA has a full web page dedicated to the eclipse at: https://science.nasa.gov/eclipses/.


Photographers and astrophotographers everywhere are making preparations to capture the eclipse. Some have elaborate plans to drive to, fly to and/or camp out in areas where they “know” there will be no clouds. They have multiple setups with long lenses, wide lenses, telescopes, video and still photography planned. There are whole collections of people from astronomy clubs, photography clubs and those just out for an adventure that are planning to camp out. Regardless of how you plan to experience the eclipse, if you do plan to capture it, there are some things you need to know.
We’ve been told since we were kids not to look up at the sun. That remains true and is especially true for events like this. Each time, there are reports of someone who has damaged their eyes when they should have known better. So, first and foremost: DON’T LOOK AT THE SUN WITH YOUR NAKED EYES!

If you do plan to photograph the eclipse, the same applies to your camera. Digital sensors are superbly sensitive to light and you can do irreparable damage to that sensor if you expose it for any length of time to the rays of the sun. But, some people ask, I photograph sunrises and sunsets without a problem. Why is it a problem now? Two reasons: an eclipse can run for 2+ hours; the sunrise or sunset exposures you take are typically less than a second. Finding just the right exposure during each stage of a 2+ hour eclipse is tricky. But more importantly, sunrise or sunset is photographed through the thickest, most dense part of the Earth’s atmosphere when you photograph on the horizon. That atmosphere is also full of pollutants close to the horizon. Both serve to limit how much of the sun’s power reaches our camera sensors and it protects those sensors from harm. That’s also why we have those wonderfully warm colours.
The sun, at maximum height in the sky, is frighteningly powerful. You need to protect yourself and your camera with a solar filter that will block most of that power and leave only enough “photons” to record the experience. Lots of people say a 10-stop or 20-stop ND filter will do just fine, but don’t believe it. Neutral density filters are not the right tool for this.
A solar filter is a curious thing. It looks like a piece of aluminum foil over a cardboard circle. The cardboard circle has pegs to allow it to clip to the front of a lens.
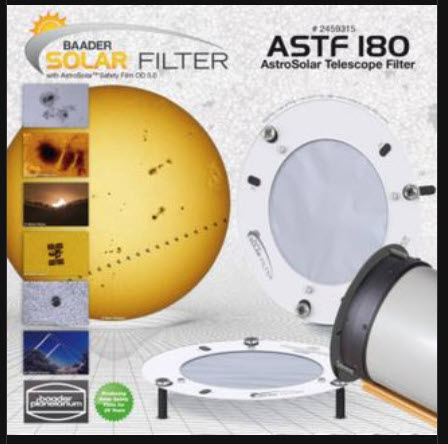
These solar filters work exceptionally well and are available for telescopes, camera lenses, binoculars and even our eyes as special solar glasses. But they are not perfect. I used them for the partial eclipse last October and found that I still had to avert my eyes frequently to avoid an overload. But they did the job very well for my smartphone (which was the only camera I had at the time). And it was also ridiculously cloudy that day, proving just how powerful the sun really is.
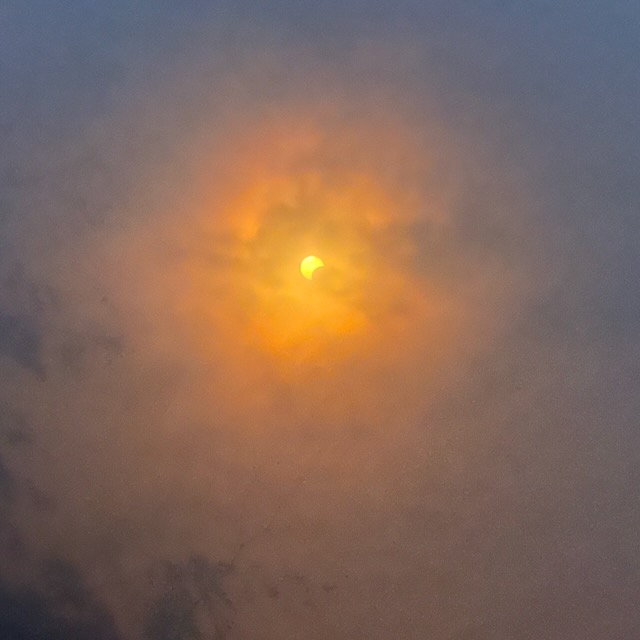
There is one unpredictable element in any plan and that is the weather (witness the clouds above). My area is not known for clear skies in April and, if this winter is any indication, we may never see them again! If you truly want to experience the eclipse and are willing to invest the time and money to get to a destination with a good likelihood of clear skies, then get planning. But frankly, you may already be too late. I’m told that accommodation anywhere along the path in the southern USA is near impossible to get or priced at levels that are really out of this world. So, I won’t be travelling far – only as far as the weather maps say might be clear in my local area.
What lens(es) to use is a big decision. If you want ease of setup and use, then a wider angle lens (under 100mm full frame equivalent) gives you are result similar to the image above. The nice thing is that you can set up your camera and not worry about tracking the sun across the sky – remember the Earth rotates and this is a 2-1/2 hour event on the path of totality. With a shorter focal length lens, you can easily create a collage of shots showing the progression of the eclipse, likely without moving your camera at all. You will just need to worry about changing exposures.
If you do want that closeup, a 600mm full frame equivalent is what you need. Anything longer will not give you any wiggle room. Keep in mind that every little movement, jitter of the camera will be magnified with a long lens. You will also have to decide how you will intentionally move the camera to keep it pointed at the sun as the Earth rotates. Some people do this manually, some do it with trackers or astronomical mounts. Long focal length lenses are heavy, if you are going to try to purchase a tracker (again, it may be too late), always check the weight limits against your gear setup.
So you are packed, at the location and ready to go. Now what?
There are two distinct events during the eclipse: the gradual darkening of the skies as the moon starts to pass in front of the sun, but still with enough sunshine to light the Earth, and what is called “totality”, when the moon fully covers the sun and the Earth is plunged into darkness, but the area (corona) around the sun glows. See examples below, courtesy of NASA. Each requires its own decisions for photo and video.

Gradual Darkening Phase – Partial Eclipse
While the gradual darkening is interesting as a video, this phase is best displayed as a collage of photographs or even a timelapse that speeds things up a bit. There are two key challenges here: the changes in light levels from beginning to middle to end, and the movement of the sun across the sky during the 2-1/2 hour period. As noted, if you use a wider angle lens, you can potentially avoid the second problem altogether and get a nice series of images that can just be blended together. This means the only thing to manage would be your camera settings. The recommended settings for the gradual darkening and brightening (but not totality) are:
| Before/After Darkness (or for a Partial Eclipse) | |
| Filter On: | Yes |
| Aperture: | F/8 |
| Shutter Speed: | 1/500 down to 1/60 or 1/15 – depends on your focal length |
| ISO: | Base – 100-200 |
| Settings to change: | Shutter Speed only |
Since you are actively changing settings as the eclipse progresses, your best bet is to set a timer for every 20-30 seconds to allow the camera to settle before taking the next image. At long focal lengths over 500mm, this is very important and will also limit the lowest shutter speed that you can use for good results. Those who have worked with long lenses for this purpose recommend no lower than 1/60 second.

Full Darkness – Total Eclipse
If you are lucky enough to be in the path of totality, at the midway point, the sky will completely darken, the sun will “disappear” and the only light will be the sun’s corona – the gases that normally escape the sun but that we can’t normally see. Taking a photograph at this time requires completely different settings to those above. You need to remember to remove your solar filter (and to put it back on once darkness passes). You are also managing ISO rather than shutter speed here. Again, your choice of a wider angle or telephoto lens will determine just how precise and regimented you have to be in changing settings quickly.
| Full Darkness (Totality) | |
| Filter On: | No |
| Aperture: | F/8 |
| Shutter Speed: | 1/60 or 1/15 |
| ISO: | High – 1600-3200 |
| Settings to change: | ISO only |
If you’ve never tried photographing the sun, I’d recommend avoiding the long lens and sticking with something under 100mm. Or have the long lens as a backup on a separate body and tripod for a few closeup shots during totality. Practicing your setup, settings management and your own vision management is a good idea before the day. It’s never too early to get everything ready. You just need a sunny day…
I watched the partial eclipse in 2017 but did not photograph it. I watched and took cellphone photos of the partial eclipse this past October. I’m told that the experience of a total solar eclipse is life changing. Certainly animals are recorded as being confused with day turning so suddenly into night. It must be a weird feeling. The last total solar eclipse in my area was in 1979 and I was a young employee at my desk in a downtown office tower. I don’t think I even had access to a window. Needless to say, I am looking forward to this one.

Great info. Thank you, Nina.
LikeLike