One of the areas that frustrates me in photography is adjusting a photograph that is “noisy”. Even with dedicated tools, I find it hard to make any meaningful improvement in the quality of the photographs I adjust. My noisy photographs seem destined to be noisy. When I adjust the sliders, the edges I want to be crisp and clear are often muted, while the remainder seems unaffected. Not at all the outcome I want.
 Even more baffling is sharpening. Related to but opposite in intent to managing noise, applying sharpening leaves me even more puzzled, since I often see little to no change in my photograph. And then there’s import sharpening vs. creative sharpening vs. export sharpening. Sharpening for screen vs. sharpening for print.
How to make sense of it all?
First, some definitions. What are noise and sharpening?
Noise in a digital image is the equivalent of film grain for film cameras. Whenever one form of energy (in the case of photography, this means light) is converted to another (either electrical signals on a sensor or chemical reactions on film), the conversion is never perfect. Other forms of energy interfere with the quality of the signal and the receiving medium itself doesn’t translate the signal correctly, creating artifiacts. So you always end up with noise. The challenge is in controlling the amount of actual “signal” to the amount of “noise”, otherwise known as the signal to noise ratio. This means that EVERY image has some level of noise.
 To apply sharpening to a photograph means to create more edge contrast where there should be a clear distinction between one side and the other side of an area on the image. In its most simple form, sharpening darkens more pixels on the dark side of the divide and lightens more pixels on the light side of the divide. The key is finding the edge. In one sense, then, sharpening means adding more noise to the image, but controlling where it goes. Sharpening applied across the entire image, without controlling which edges receive it, will increase noise across the entire image.
There are many techniques for reducing noise after the image is taken, but perhaps fewer for managing it in the first place. Most photographers associate noise with ISO, taking great pains to set the sensitivity to as low as possible before taking the shot.
By the way, in case you were not aware, there was a controversy started some time ago when Tony Northrup pointed out that ISO values are not the same across all cameras – other things being equal, ISO 100 can result in far darker images on some cameras than on others.
Frankly, I’m not surprised, given the variety of sensor configurations and sizes today, along with the intelligence that interacts with them. I’m not sure it’s such a big deal though, as long as each of us knows how their camera performs.
And to add more complexity, it seems some of the latest cameras today are noise stable, in that the same level of noise is generated no matter which ISO setting is used. The newest Sony, Nikon and Fuji mirrorless cameras apparently fall into this camp, probably Canon too. This is quite a feat, considering that noise should logically increase in proportion to the signal amplification that occurs when ISO is increased. Those in-camera computational processing algorithms are getting really smart.
It seems that there are three types of noise that can be present in an image. A wonderful article on Cambridge in Colour explains it:

The first type of noise is random noise. This is bright or dark speckles (luminance noise) combined with colour speckles (colour noise). It changes shape and position with each shot and, for most cameras, each ISO setting.
The second type is fixed pattern noise, also known as hot pixels. It appears under specific conditions, such as long exposures and overheating of image sensors because of ambient or other conditions. It usually disappears once the camera/sensor is cooled but the same pattern may reappear.
Banding noise can also appear in the shadows on some images when the data from the image sensor is read. It is often associated with high ISO levels and when images are brightened excessively in post-production.
Apart from shooting with as low an ISO as possible, one other technique for managing noise is taking multiple images of the same scene, then stacking them in post and having software analyse the random differences between the images. Adobe Photoshop includes the ability to weed out the noise this way.

Topaz DeNoise and other dedicated noise removal programs work with single images and have special algorithms that distinguish edge contrast from random noise. Some are better than others; some handle specific situations better than others. I’ve had reasonable success with Topaz DeNoise and would recommend it.
Sometimes, the goal is actually to increase noise in an image, to give it a grungy, rough, hard look. This is especially useful for street scenes, urban decay, portraits of elite athletes (especially those in combat sports like boxing). The trick is to have it enhance the image, rather than interfere with it.
Now for sharpening.

The majority of digital cameras include built-in hardware or software filters to help deal with distortions, aberrations and other optical or sensor or processor deficiencies. They are intended to strike a balance between the clarity and detail of the image and the potential for incorrect representation of that image. For example, most cameras include anti-aliasing filters that help to resolve pattern information that would otherwise be distorted if the filter was not used (as in the example above of a brick wall with no filter on the right).
The use of such filters by design results in less data available for processing. So most software programs that convert RAW data, as a first step, often include “input sharpening” to maximize detail. As noted, sharpening enhances the contrast between light and dark edges. Depending on the camera, this may be applied automatically on import or even prior to import. It is adjustable, even when applied automatically.
A great article on sharpening is the another from Cambridge in Colour. Unlike many other websites, this website really answers fundamental questions around how photography works. A nerd like me finds this invaluable. I think you will too.

It’s worth describing what sharpening is NOT. It is not a way of repairing an out of focus image, although Topaz offers a software program supposedly aimed at doing just that. It is not a way of zooming in to reveal more detail when lens reach was insufficient. It also is not intended to bring more “punch” to an image that is flat and uninteresting but can make an image more “crisp”.
In addition to import, sharpening can be applied during processing and at export. During processing, it’s intended as an artistic decision, allowing for creative image contrast to direct attention through different areas in the image. It is typically selectively applied. And there are a number of different sharpening tools available to create the desired effect, each one applying that edge contrast in a slightly different way.
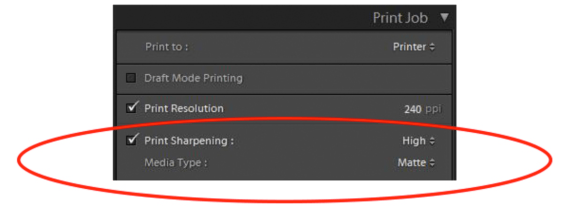
At export, sharpening serves a completely different purpose. Like input, output sharpening is intended to overcome limitation, this time in the display medium for the image. If being shared online, output sharpening helps to compensate for the algorithms of sharing services that reduce the quality (and storage space requirements) of shared images. If being printed, output sharpening helps to compensate for the physical spread of ink on paper that can create some softness in a printed image. Output sharpening also considers the final planned image size, to define the size of the details included in the image and the settings that best enhance those details.
 So how do noise and sharpening relate? In one respect, noise is image detail, albeit not desired image detail. Like all other edges in an image, the edges of noise also have contrast and can also be affected by sharpening. So sharpening a noisy image needs a different mindset and approach than sharpening a low noise image. Luckily, all good sharpening tools have the ability to restrict the edges to which the effect will be applied. So once noise is reduced, sharpening can be applied to the remaining edges of interest selectively.
Lots of great information, but I’m still left with the dilemma of not really seeing much difference in my imported or exported images after applying sharpening. I see more benefit from removing noise than I do from sharpening. But maybe that’s the way it should be. Removing noise should be noticeable because I am taking something away that is undesirable. Adding sharpening should not be noticeable, but should instead impart an intangible unconscious improvement that works alongside all other improvements to deliver a great image. If you can tell what has been sharpened, it has been overdone.
Like all things in photography, managing noise and sharpness take practice. And greater understanding may also lead to some improvements in image capture, eventually eliminating the need for these corrective steps to begin with. Wouldn’t that be grand!
